
Weld Joint
Joint Geometry
Welding quality
What Should You Check During Weld Joint Fit-Up Inspection?
By First Welding Certification Technical Editorial Team
6 Min Read Time
23 Oct 2026
Table of Contents
- Introduction
- What Is Weld Joint Preparation?
- Why Joint Geometry Matters
- Root Gap: A Critical Fit-Up Parameter
- Alignment and Fit-Up Accuracy
- Edge Preparation and Surface Condition
- Surface Cleanliness Before Welding
- Pre-Weld Inspection: A Step-by-Step Approach
- Common Fit-Up Problems and Their Preventive Actions
- Frequently Asked Question
- Related Searches
- Conclusion
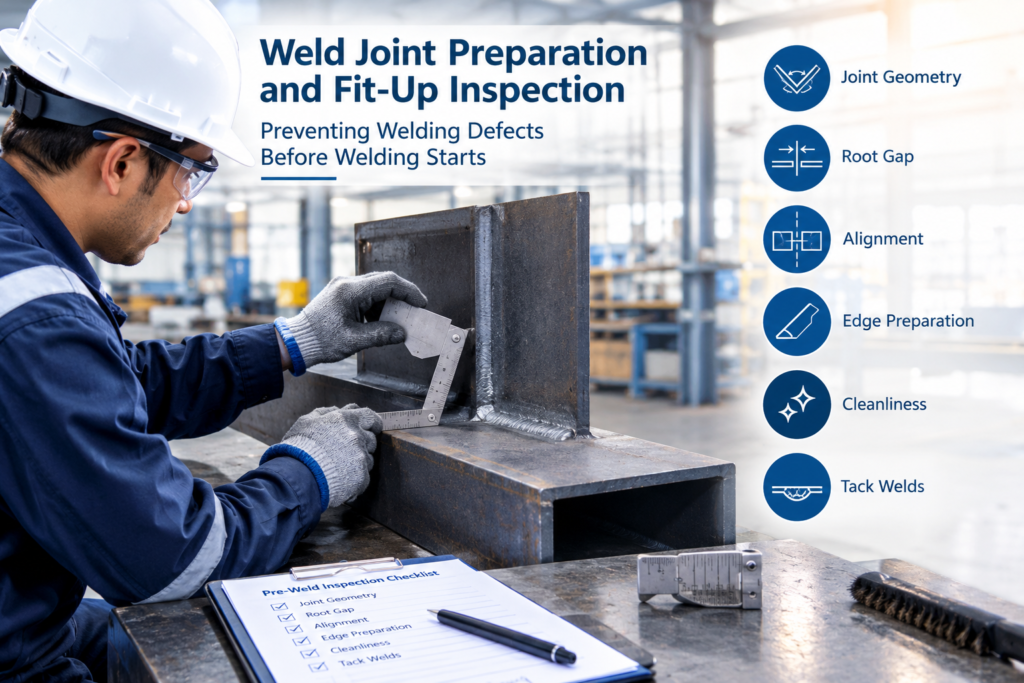
Welding quality begins long before an arc is struck. Even when a qualified welder follows the correct welding procedure, poor joint preparation or inaccurate fit-up can lead to defects, dimensional problems, rework, and delays in production.
In structural steel fabrication, pressure equipment manufacturing, railway applications, and other industrial sectors, weld joints must be prepared and assembled according to the applicable drawings, welding procedures, and technical requirements. Factors such as joint geometry, root gap, alignment, edge condition, and surface cleanliness can directly influence the quality and consistency of the finished weld.
A systematic pre-weld inspection helps identify these issues before welding begins, when corrective action is generally easier and less expensive.
This article explains the key elements of weld joint preparation and fit-up inspection, common problems to watch for, and practical measures manufacturers can use to improve welding quality.
What Is Weld Joint Preparation?
Weld joint preparation is the process of preparing the edges and surfaces of components before welding. It establishes the joint configuration required for the specified welding process and helps ensure that the weld can achieve the required quality.
Depending on the material thickness, joint design, welding process, and application, preparation may involve cutting, machining, grinding, beveling, cleaning, and removing surface imperfections.
Common joint configurations include:
- Butt joint: Two components are positioned in approximately the same plane and joined along their edges.
- Fillet joint: Components meet at an angle, commonly forming a T-joint, lap joint, or corner joint.
- Single-V or double-V joint: One or both sides of the joint are prepared with a V-shaped groove to provide the required access for welding.
- Single-bevel or double-bevel joint: One component edge is prepared at an angle to create the specified groove.
- Square butt joint: The edges remain square, where permitted by the joint design and applicable requirements.
The selected joint configuration must be suitable for the material, thickness, welding process, accessibility, and specified quality requirements.
Why Joint Geometry Matters
Joint geometry describes the shape and arrangement of the prepared components before welding. It includes factors such as bevel angle, root face, root opening, and the relative positioning of the parts.
These parameters should be established by the applicable drawing, welding procedure specification (WPS), or other governing technical documentation.
Bevel Angle and Groove Preparation
For groove welds, the bevel or groove angle influences access to the joint root and the space available for depositing weld metal.
An angle that is too small may restrict access and make it more difficult to achieve the required fusion. An angle that is larger than specified may increase weld volume, consumable usage, and production time.
Inspectors should verify the prepared groove against the applicable requirements rather than relying on visual appearance alone.
Root Face
The root face is the portion of the prepared edge that remains un-beveled at the root of a groove joint.
Its dimensions can influence the welding conditions required to achieve the specified root penetration. An excessively large root face may make penetration more difficult, while an insufficient root face may contribute to burn-through or an unstable root during welding under certain conditions.
The acceptable dimensions depend on the specified joint design and welding procedure.
Joint Accessibility
Joint preparation must also allow the welder to access the required weld region using the intended welding process.
Restricted access may make it difficult to maintain the correct electrode or torch angle, control the weld pool, and achieve consistent fusion. These considerations are particularly important for complex structural assemblies and joints with limited access.
Root Gap: A Critical Fit-Up Parameter
The root gap, also called the root opening in many welding applications, is the separation between the components at the root of a joint before welding.
Maintaining the specified root gap is important because it influences how the root pass is deposited and whether the required penetration can be achieved.
What Happens When the Root Gap Is Incorrect?
Root gap too small
A gap that is smaller than specified can restrict access to the joint root. Depending on the joint design and welding conditions, this may contribute to incomplete penetration or lack of fusion.
Root gap too large
An excessive gap may make the root difficult to bridge and can increase the risk of burn-through, excessive root reinforcement, or other weld discontinuities. It may also require additional consumables or corrective fit-up work.
Uneven root gap
A gap that varies along the joint can produce inconsistent welding conditions. The welder may need to compensate for changing geometry, increasing the risk of inconsistent weld quality.
How to Inspect Root Gap
Before welding begins:
1. Review the specified root opening in the applicable drawing or WPS.
2. Use a suitable measuring tool or weld gauge.
3. Check the gap at representative positions along the joint, including areas where variation is likely.
4. Verify that the gap remains within the permitted range.
5. Correct unacceptable variations before releasing the joint for welding.
Do not assume that a root gap suitable for one joint is appropriate for another. Acceptance limits must come from the applicable technical requirements.
Alignment and Fit-Up Accuracy
Fit-up refers to the positioning and assembly of components before welding. Correct fit-up helps establish the required joint geometry and reduces the risk of dimensional problems in the finished product.
Misalignment Between Components
Misalignment occurs when the components do not meet in the intended position. In a butt joint, this may appear as a difference in the levels of the adjoining surfaces, often described as internal or external misalignment depending on the joint configuration.
Excessive misalignment can affect the final geometry, produce uneven weld profiles, and create local stress concentrations. Its acceptability depends on the applicable design, specification, and acceptance criteria.
Angular Distortion Before Welding
Components may be positioned at an incorrect angle due to inaccurate assembly, unsuitable fixtures, or dimensional variation in the parts.
If the initial joint angle is incorrect, welding and subsequent shrinkage may make the final dimensional condition more difficult to control.
Incorrect Component Positioning
Incorrect positioning can affect overall dimensions, connection locations, hole alignment, and the ability to assemble the finished structure at the next production stage or on site.
Good Practices for Fit-Up Control
- Check component dimensions against approved drawings.
- Confirm joint location and orientation before tacking.
- Use suitable fixtures, clamps, and alignment tools.
- Verify root gap and surface alignment at multiple locations.
- Check that temporary attachments do not interfere with welding or damage the material.
- Record inspection results where required by the inspection plan.
Fit-up inspection is especially important for assemblies involving multiple connected components, where small dimensional variations can accumulate.
Edge Preparation and Surface Condition
The condition of the joint edges affects welding consistency and the ability to achieve the specified weld quality.
Cutting, machining, and grinding can leave burrs, sharp projections, slag, or other irregularities. Depending on the process and material, the prepared edges may also contain oxidation, scale, or surface damage.
Common Edge Preparation Problems
- Rough or irregular edges: These can make it difficult to maintain consistent joint geometry and root opening.
- Burrs and sharp projections: These may interfere with accurate assembly or create local gaps.
- Incorrect bevel dimensions: An incorrect bevel angle or root face can alter the joint geometry and welding conditions.
- Cutting defects: Surface imperfections or damage may require further assessment and preparation before welding.
Recommended Controls
Use suitable cutting, machining, or grinding methods to produce the required joint profile. Remove burrs and loose material, and inspect the prepared edges for unacceptable imperfections.
Where the material or application requires additional checks, follow the applicable material and fabrication requirements.
Edge preparation should be verified before assembly, rather than relying entirely on the final weld inspection to reveal problems that originated earlier in production.
Surface Cleanliness Before Welding
Contamination around a weld joint can interfere with welding and contribute to defects. The type of contamination and its effects depend on the material, welding process, consumables, and joint conditions.
Potential contaminants include:
- Oil and grease.
- Moisture or water.
- Rust and loose scale.
- Paint and other coatings.
- Dirt, dust, and foreign particles.
- Residues from cutting or grinding operations.
For example, moisture or certain contaminants may contribute to porosity or other weld quality problems. Surface contamination can also interfere with the formation of a sound weld.
How to Maintain Joint Cleanliness
Before welding, inspect the joint faces and the surrounding area. Remove contamination using cleaning methods suitable for the material and welding process.
Ensure that cleaning products do not introduce additional residues. Where required, allow surfaces to dry fully before welding.
For stainless steel, aluminium, and other materials with specific contamination-control needs, use suitable tools and cleaning practices to avoid cross-contamination or damage.
Cleanliness requirements should be consistent with the applicable WPS and project specification.
Pre-Weld Inspection: A Step-by-Step Approach
A pre-weld inspection provides an opportunity to confirm that the joint is ready for welding. The inspection should be proportionate to the component, joint type, project requirements, and applicable quality plan.
Step 1: Review the Documentation
Confirm that the latest approved drawings, joint details, WPS, material specifications, and applicable inspection requirements are available.
Check that the intended welding process and joint configuration are consistent with the approved documentation.
Step 2: Verify Material Identification
Where required, confirm material grade, thickness, identification markings, and traceability records.
If identification is missing or a discrepancy is found, resolve it according to the established quality procedure before proceeding.
Step 3: Inspect Joint Preparation
Check the bevel angle, root face, edge condition, and groove configuration against the specified requirements.
Look for irregularities, damage, or contamination that could affect welding quality.
Step 4: Measure Root Gap and Alignment
Use appropriate measuring tools to verify root opening, component alignment, and joint positioning.
Check for variations along the joint rather than measuring only at one location.
Step 5: Check Tack Welds and Fixtures
Verify that the components are adequately secured, the intended dimensions are maintained, and tack welds are acceptable for the planned welding sequence.
Step 6: Confirm Surface Cleanliness
Ensure that the joint and surrounding areas meet the applicable cleanliness requirements and that any necessary preheating or other preparation requirements have been addressed.
Step 7: Record and Release
Document inspection results where required. Any deviation should be corrected or formally addressed through the applicable nonconformity process.
Welding should begin only after the required checks have been completed and the joint has been released in accordance with the organization’s procedures.
Common Fit-Up Problems and Their Preventive Actions
These are potential consequences, not automatic outcomes. The actual risk depends on the joint design, welding process, material, and applicable requirements.
| Common problem | Potential consequence | Preventive action |
|---|---|---|
| Incorrect root gap | Inconsistent root penetration or difficulty controlling the root pass | Measure the opening against the specified requirements |
| Excessive misalignment | Poor joint geometry and possible dimensional nonconformity | Check alignment before tacking |
| Incorrect bevel angle | Restricted access or unnecessary weld volume | Verify groove preparation against approved details |
| Contaminated joint surfaces | Increased risk of weld discontinuities | Clean and inspect the joint before welding |
| Defective tack welds | Cracking, local defects, or movement during welding | Inspect and correct tack welds before final welding |
| Inadequate restraint or fixturing | Component movement and dimensional variation | Use suitable fixtures and verify stability |
| Missing material identification | Traceability and verification difficulties | Confirm required identification before fabrication |
Frequently Asked Questions
Why is joint preparation important before welding?
Joint preparation establishes the required joint geometry and access for welding. Incorrect preparation can make it more difficult to achieve the specified penetration, fusion, weld dimensions, and overall joint quality.
What happens if the root gap is incorrect?
A root gap that is too small or too large can change the welding conditions and increase the risk of certain discontinuities. The appropriate range depends on the joint design, welding procedure, material, and applicable requirements.
Who should carry out pre-weld fit-up inspection?
The responsible personnel depend on the organization’s quality system and project inspection plan. Fit-up checks may involve production personnel, welding coordinators, quality inspectors, or other designated competent personnel.
Is visual inspection sufficient before welding?
Visual inspection is an important part of pre-weld verification, but additional measurements or checks may be required. These can include root gap measurement, alignment checks, material identification, and verification of joint preparation against approved documentation.
Related Searches
- When Do You Need a New WPQR? 10 Welding Changes That Can Trigger Requalification
- WPS Qualification Range: Key Variables Explained
- EN ISO 3834 Contract Review: Welding Requirements, Technical Specifications and Quality Planning
- Welding Supplier Prequalification Checklist: 20 Documents Buyers Check Before Approval
Conclusion
Reliable welding quality starts with a properly prepared and accurately assembled joint. Correct joint geometry, controlled root gap, suitable alignment, clean surfaces, and acceptable tack welds create the conditions needed for consistent welding performance.
Pre-weld fit-up inspection provides a practical opportunity to identify deviations before they become more difficult or expensive to correct. By checking the joint against approved drawings, welding procedures, and applicable project requirements, manufacturers can reduce avoidable rework and strengthen quality control throughout production.
For organizations involved in structural steel fabrication, pressure equipment, railway manufacturing, and other welding-intensive industries, treating joint preparation as a critical quality-control stage supports more consistent execution and reliable finished products.
Need Guidance on Weld Joint Preparation or Fit-Up Inspection?
First Welding Certification Pvt Ltd (PRVÁ ZVÁRAČSKÁ, a.s.) can help you explore the relevant welding quality and certification requirements for your application.